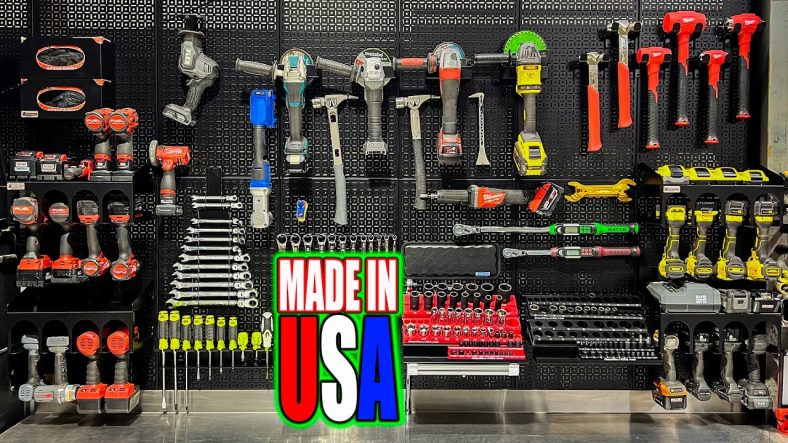
We changed out our studio backdrop with the OmniWall made in the USA Metal Pegboard.
OmniWall Metal Pegboard:
Keep current with our great content:
YouTube:
Instagram:
TikTok:
Facebook:
Twitter:
Foreign We finally decided to change out our Backdrop in fact we're actually changing Out the actual backdrop as well as a lot Of the tools that will be on there and Accessories and the reason we did that Was not that the other one wasn't Working but we came across another Product that just seemed Superior and The more we talked to them we met them At SEMA it's actually Omni wall and Their products are just a step better in Fact they're the best we've seen when it Comes to metal pegboard and accessories Not only that they're made here in the USA they're actually fabricated here in The USA with USA steel now there are Some components like you know outlets And rechargeable lights and things like That that obviously are probably coming From another continent but as far as the Main product the metal pegboard the Metal pegs the accessories they make That's all fabricated right here in the U.S even powder coated right outside of Their shop as well so very excited to See that during these times it's hard to Find companies that are still producing Products here in the USA so that was one Of the big reasons we chose them but Really that's probably not the most Important because if it was USA made and It wasn't a great product we probably Still wouldn't go with it but first this
Is a great product and second it is made Here in the U.S so we jump to the chance To actually work with them but really And truly we worked with them a while And tried it out on a couple of other Areas before we decided to change out The backdrop that everyone sees in every Single video so that's been an ongoing Process for the past six months or so Now installing these panels is very Straightforward they have a rail system That you install a top Rail and then a Bottom rail but when you have stacked Like this where we have two panels Stacked on top of one another you use a Top rail then another top rail that is Actually used as the bottom and top and Then the bottom rail goes on the bottom They have these push Clips to actually Lock them into place very simple process And they're Productions walk you through It seamlessly there are some ways to Cheat the system if you want to you can Either lay out the rails make sure They're level at the top then just Measure down 32 inches or in if you're Laying these sideways you may measure Down 16 inches but regardless whatever Size of the panel you measure down that Far set the other Rail and set your Distance on that as long as you have the Top level and you're good to go or you Can actually hang the panel and use that As a spacing to mark your holes and once
The rails are actually set then laying The panels are really easy they lay in There and then you use these push Clips To actually lock them into place so Really simple process of installing the Panels so now what we're going to do is Just start installing some of these Accessories we'll talk about the Different accessories as we install them Show you how easy they lay in there as Well as how nice they mesh together just Like the corners of these panels I'm Telling you their fabrication and their Attention to detail from the package to The actual panels themselves and Accessories I I have not seen a better Product when it comes to organization Like this and you can see in just the Corners of how straight and detailed Everything is the gaps are almost dead On Um didn't have to do any tweaking Whatsoever in laying out these panels Other than just you know maybe Straightening some of my two by fours That are the main structure behind this But other than that as far as the system Itself almost near perfect so let's get Started now first up we're going to Install this power tool holder here Which you see you have four different Slots where you can hang your power Tools you can hang them right side up Upside down whatever makes sense and we
Can either just lay this in there where It just lays on the hooks as you can see Here we have eight hooks so four on this Side and four on this side or where you See these holes here that will line up With the holes in the pegboard and you Can actually put locks on them and There's some on the bottom and on the Top Foreign It's as easy as that so you see how Sturdy that is out of the gate even Without the pins now they use these and These are the same ones for the panels As well like a two-piece uh looks like a Lot of stuff under the hood of cars These little pins little two-piece pins And it's easier if you just take them Bare or separated and push the base in First especially if the locks are brand New because they are pretty stiff Because they lock in there really well And then you can push these in But if you've got something to push with Then you don't have to do that you can Actually leave them two pieces when you Push them in and just push the locks in Then we have another power tool holder This time we'll leave the the Locking Pins in there just pull them out a Little bit Push them in here at the bottom And lock them in place Then we have some simple glove holders
That we're going to add And then little simple hooks like this Like any other typical pegboard well It's not really like a typical pegboard Because you can slide them in there and Just leave them as is as a hook to hang Something on but they're a little Loosey-goosey like any other typical Pegboard when you install the hook the Difference is if you want to you don't Have to Again just like on the shelves there's a Hole you can line up Push the lock in the pin and now that Hook is on there nice and tight We have two different types of wrench Holders one is this one here And we're definitely going to use some Locks on this one We'll show you the other wrench holder In just a moment and then we have a Screwdriver or nut driver holder depends On what you're putting in there And if you misinstall it like I did You can easily Take a little pry tool Pry those clips out and they're reusable Raise it up And once they've been used once they're A little easier to put back in And another screwdriver holder for our Nut drivers Then our different style of wrench Holder
So a different style of wrench holder That where you can easily just get them Off the hook off a single hook rather Than laying in a cradle then we have Some more just typical hooks Then we have a few grinder holders these Are really nice and hold the Grinders Very well we'll show you here in just One moment Thank you Sit in there very nicely Easily take them out And then we've just got some tool Holders that we're going to mount in This case some hammers And then you even have medium Hooks and Longer Hooks and this is a medium hook That I've cut the end off so it will fit My line tools For separating fuel lines and air Conditioning lines different things Foreign Cool racks right here as well So these are magnetized trays And you have a little finger hole where You can grab and and pull that off But then you can take them with you as You need to to do your job and then Return them you've got a nice place for Everything they even have places on the Back here for ratchets and extensions as Well and we'll round this out by Installing two more power tool holders With a Twist if you will
So additional items they have that Really complement Things like a power tool holder would be A power strip which they have still Mounts here you have multiple 120 volt Power outlets as well as multiple USB as Well on off switch also if you want to Turn it on or off And then they even have things like a Flexible magnetic mat get right there on The wall And obviously that can Hold tools or bits or screws or whatever You need when you're working on Something And then even things like a rechargeable USB light Three different settings here Magnetic so you can mount it under Provide some light if you needed to So just some pretty cool additional Components and accessories that add to The system so as I mentioned this is not Our first go around with Omni wall we Installed a small wall in another Section of our shop as well as their Cabinets that mounts to their pegboard As well which isn't really awesome Product and a really awesome solution For many many different types of Trades And even in the uh protection industry If you know what I mean I will have a Link in the description to many of these Products But be sure to check out Omni
Wall we love our new wall as we Mentioned we were kind of taking our Time to make sure it was something that We definitely wanted to do because this Was not a small undertaking but also This is something we want to leave up Here and last for a long time and we are Not sorry that we did because as we've Mentioned many times this is a top Quality product and you can just see it In the quality of each piece so be sure To check it out also keep track of us on Instagram Facebook Twitter and even Tick Tock have a great day and keep smiling

